Discord audio can benefit you in many ways, like if you want to record and promote your audio chats with your friends as a podcast or just want to use the audio while streaming your own Youtube video. However, Discord does not directly offer you the ability to record Discord audio, and whether you can record an audio or not totally depends upon your role on that particular discord server. Thankfully, You can use other third-party services and record your audio on Discord.
Discord is a great community building and VoIP platform that allows you to connect and chat with your friends over call or text messages using the Discord Servers options. Discord allows you to have in-game chats, Calls, Share content using spoiler tags, and Create your own private server to host your own community or friends.
Recording audio on Discord can be helpful for many users and if you are one such user looking for a way to record discord audio on your own server or on someone else’s server then this article is for you.
How to Record Audio on Discord
One of the biggest advantages of having your own server is that you can add and manage different bots and add various features and functionality to your server. There are many tools that can help a discord server owner easily record Discord calls.
Craig Chat Bot
One of the popular tools used to record discord calls is the Craig chatbot. This tool allows the server admins to effortlessly record all audio chats on their own server. Craig chatbot not only records audio but also records it in different tracks so that each individual user’s audio chat is recorded as a different track to help you in editing. The chat bot also informs all other users about the recording so that they can know that they are being recorded.
Below are the steps to add Craig Chat bot to your Discord server and start recording audio calls.
Step 1:
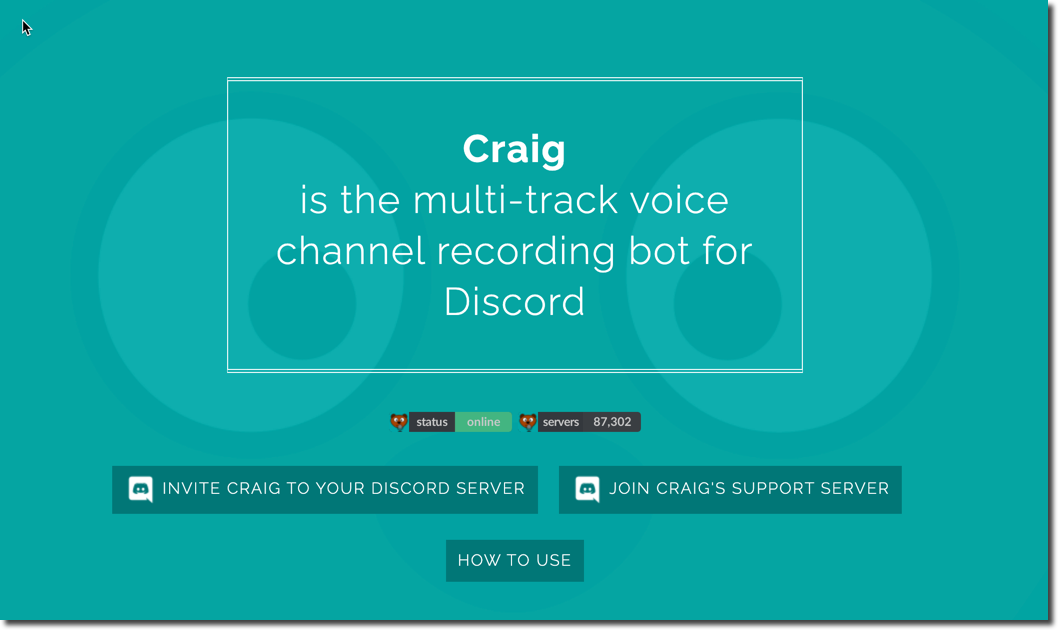
To Start using the Craig chat bot, Visit Craig’s official website and click the “Invite Craig to your Discord Server” button.
Step 2:
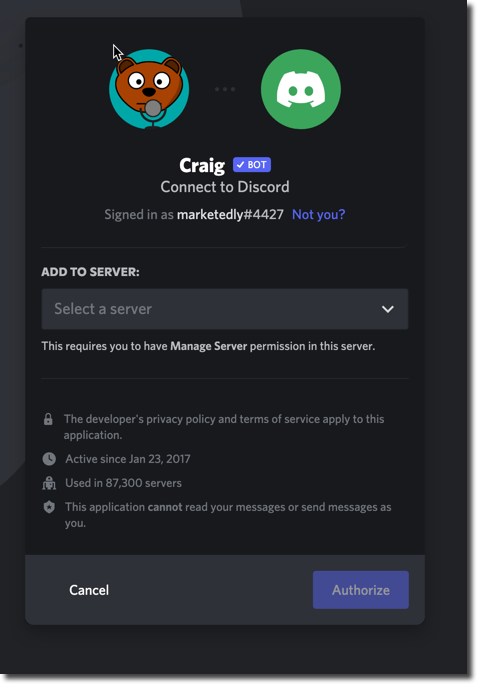
On the following screen, You will be asked to log in to your Discord account and authorize Craig to join your server before it can start recording audio. Click the “Select a server” dropdown and select the desired server and click the Authorize button to continue. Once it is authorized, you don’t have to do anything else. Just visit your server and start recording.
Step 3:
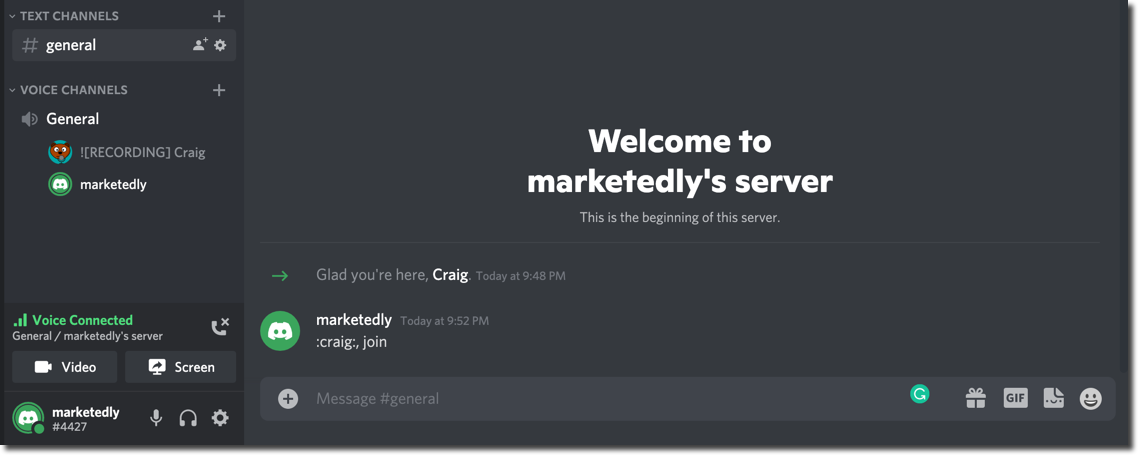
Use the :craig:, join command to start recording the audio. As soon as you enter the command, Craig will send you an audio notification saying “Now Recording”. It will also reflect in the Voice Channels tab on Discord.
Step 4:
Whenever you want Craig to stop recording the audio on your Discord Server, just type :craig:, leave this will force Craig to leave your channel and stop the recording. If you want Craig to stop recording across all the channels then type :craig:, stop.
Craig will send you a private message with Download or delete recording links. Use the appropriate options to download or delete the recording.
Record Discord Audio using Camtasia
If you are an early streamer or Youtuber then you must have used Camtasia to record your videos and edit them. Currently, Camtasia is used by over 20 Million people to record and edit their videos. This tool is also great for recording audio, especially, your discord stream audio.
We recommend you try their 30-days trials before purchasing the product. Go to their website and install the trial version by submitting your information. Download the setup file and double-click it to open. Follow the installation wizard until the software is completely installed on your computer. Finally, Launch the program on your Windows 10 or Mac and follow these steps.
Step 1:
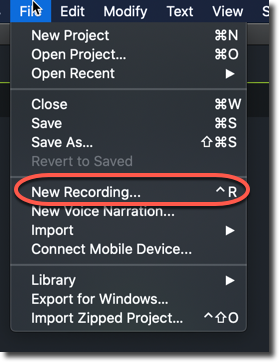
On the Launch window of Camtasia, Select the “Create a Project” option. Click the File option and select “New Recording” from the dropdown menu.
Step 2:
On the Recorder popup option, Select your desired choices, and don’t forget to enable the System Audio option to record your Discord audio using Camtasia.

Step 3:
Once you have made your selections, Just hit the Start Recording button and open your Discord server and start having conversations with the users. Once you are done, Just hit the Stop Recording button and Camtasia will automatically import your recording to the Camtasia editor. Here, you can edit or save your audio on your Computer.
Using OBS
OBS is a famous Open Source Video Streaming platform mostly used by worldwide streamers to stream their live gameplay across multiple platforms like Facebook, Youtube, and Twitch. If you are just a user on a Discord Server who wants to record audio then OBS is definitely for you. OBS is available for Windows, Mac, and Linux and you can download it for free.
Once you have downloaded and installed OBS on your Computer, Follow these steps to successfully record Discord Audio using OBS.
Step 1: Launch OBS on your computer and Click File >> Settings >> Output >> Recording Format and make sure that it is set to MP4.
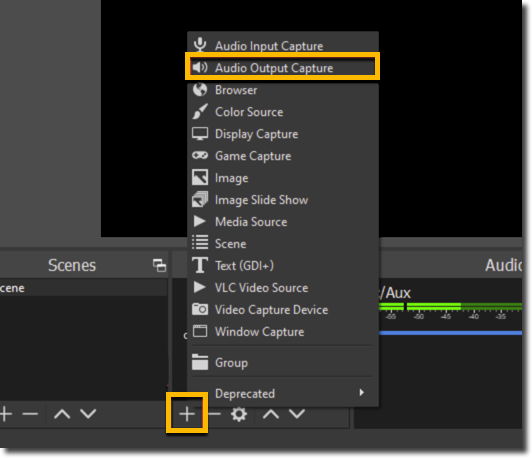
Step 2: Head back to the Launch Screen and click the (+) icon in the Sources Panel and select the “Audio Output Capture” option.
Step 3: On the next pop-up screen, Give your Recording a name or just leave it default and hit the OK button.
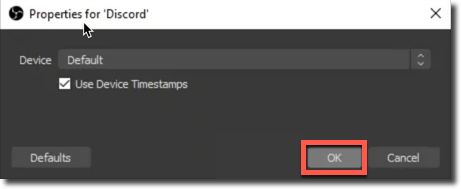
Step 4: On the Properties window, Leave the default settings as it is and hit OK.
Step 5: Use the Audio Mixer option to set the output audio volume and other settings using the Slider option and hit the Start Recording button.
Step 6: Once you are done, hit the Stop Recording button and confirm the Stop recording command on the following popup screen to completely stop recording your discord audio.
Conclusion:
These are the methods that you can use to record audio calls on Discord. However, please use this option cautiously and let other users on your server know that you are recording their audio as in many countries, it is illegal to record audio without someone’s consent.
Please let us know if you have any questions or queries regarding recording audio on Discord by commenting below.
